
How to use Lottie animations in Flutter 3.16
Learn how to import Lottie animations and use Animation Controller


In this tutorial, we go over the basics of Lottie animations and their use inside Flutter. We will see how Lottie animation files are represented in JSON and .lottie (DotLottie) formats. Then, we will put them into practice in a Flutter mobile app.
This is my system.
| Software | Version | Notes |
| Flutter | 3.16.9 | Installed on Win 11 (not WSL) |
| Android SDK | 34 | Android Studio Hedgehog |
Lottie Animations
Lottie animations are vector graphics animations. They are usually simple and short. Artists and designers can make the animations in Adobe After Effects or Figma, and then they can export them into a Lottie animation.
Here is an example animation on LottieFiles, a website for sharing Lottie animations.
The name "Lottie" is named after the film director Lotte Reineger.
File Formats
Lottie animations are not stored like normal animations, that is, in video files or GIFs. This is because the size of the files is too big and the pixelated resolution goes against responsive design.
In 2015, Hernan Torrisi developed a JSON format, now standardized by the Lottie Animation Community. The JSON format is minified for storage efficiency and rendered onto the screen by a player at runtime. Here is an introduction to the JSON format.
In 2020, LottieFiles developed a binary file format called .lottie (DotLottie), which is a ZIP version of the JSON format. The biggest benefit of .lottie is its much smaller file size, up to 70-90% smaller than JSON!
Using Lottie Animations
To use Lottie animations, we need a Lottie player that can parse the animation data from JSON or .lottie and render it to the screen. In Flutter, the most popular package for this is called lottie.
Setup
The animations we are using in this tutorial come from LottieFiles. Follow the links to download both the JSON and .lottie formats. In practice, we only need one format, but we will learn how to use both.
Create a Flutter project with flutter create. Move the downloaded files into an assets folder.
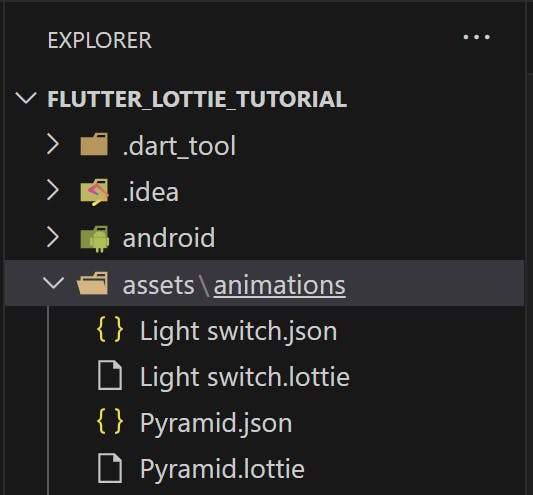
Modify the pubspec.yaml accordingly. Import the Lottie animation packages and expose the asset path.
# ...

dependencies:
    # ...

    # animations
    lottie: ^3.1.0
    dotlottie_loader: ^0.0.3 # only if you want to use .lottie

# ...

flutter:

    # ...

    # To add assets to your application, add an assets section, like this:
    assets:
        - assets/animations/
Importing JSON
To use the JSON format of a Lottie animation, it only takes one line.
For example, this is in main.dart.
import 'package:flutter/material.dart';
import 'package:lottie/lottie.dart';

void main() {
  runApp(const LottieExampleApp());
}

class LottieExampleApp extends StatelessWidget {
  const LottieExampleApp({super.key});

  @override
  Widget build(BuildContext context) {
    return MaterialApp(
      home: Scaffold(
        body: Lottie.asset('assets/animations/Pyramid.json'), // <-- this line
      ),
    );
  }
}
Lottie.asset() is a named constructor available in lottie.
This will give you something like this. By default, the animation loops forever. To change that behavior, there are adjustable parameters in the Lottie.asset() method. For more fine-grained control, an AnimationController is needed.

Importing .lottie
Make sure the dotlottie_loader package has been added to the pubspec.yaml.
class LottieExampleApp extends StatelessWidget {
  const LottieExampleApp({super.key});

  @override
  Widget build(BuildContext context) {
    return MaterialApp(
      home: Scaffold(
        body: DotLottieLoader.fromAsset(
          "assets/animations/Pyramid.lottie",
          frameBuilder: (BuildContext context, DotLottie? dotlottie) {
            // check whether the animation has been loaded
            if (dotlottie != null) {
              return Lottie.memory(dotlottie.animations.values.single);
            } else {
              // what to render while it is loading
              return Container();
            }
          },
        ),
      ),
    );
  }
}
This produces the same thing as the JSON format but saves space on asset storage. Notice how the DotLottieLoader still needs the Lottie package. These two packages work together.
Animation Controllers
Animation controllers are widgets that control animations. We will use them to play the light switch animation from night to day and vice versa when the user taps on it.
To start, create a boilerplate animation controller widget using VS Code's Flutter extension. Simply type 'st' and select "Animation Controller". Alternatively, copy the following.
This is in a different Dart file called light_switch.dart.
class LightSwitch extends StatefulWidget {
  const LightSwitch({super.key});

  @override
  State<LightSwitch> createState() => _LightSwitchState();
}

class _LightSwitchState extends State<LightSwitch>
    with SingleTickerProviderStateMixin {
  late AnimationController _controller;

  @override
  void initState() {
    super.initState();
    _controller = AnimationController(vsync: this);
  }

  @override
  void dispose() {
    _controller.dispose();
    super.dispose();
  }

  @override
  Widget build(BuildContext context) {
    return // widgets to show
Yes, animation controllers are just stateful widgets with a SingleTickerProviderStateMixin. With this, we don't have to use setState() at all!
Next, let's set up the .lottie import wrapped inside a GestureDetector.
@override
  Widget build(BuildContext context) {
    return GestureDetector(
      onTap: () {}, // TODO!
      child: DotLottieLoader.fromAsset(
        'assets/animations/Light switch.lottie',
        frameBuilder: (context, dotLottie) {
          if (dotLottie != null) {
            return Lottie.memory(
              // .lottie can contain more than one animation
              // pick one
              dotLottie.animations.values.single,
              controller: _controller,
              onLoaded: (composition) {
                // the content of this Lottie animation
                _controller.duration = composition.duration;
              },
            );
          } else {
            // show nothing while it is loading
            return Container();
          }
        },
      ),
    );
  }
Here we add the duration of the animation to the controller during the onLoaded callback of the Lottie.memory() factory method. Without setting a duration, the animation cannot play.
Responding to User Taps
Let's write two methods that play the animation from night to day and vice versa.
We are still in the stateful widget's State<>.
  /// Animate the switch to the day position
  TickerFuture animateToDay() =>
      _controller.animateTo(_dayFrame / _composition.durationFrames); // a ratio

  /// Animate the switch to the night position
  TickerFuture animateToNight() => _controller.animateBack(0);
Let's define the private fields in the class.
  /// The frame on which the animation reaches the day state
  final double _dayFrame = 60;

  /// Information about the Lottie file
  late final LottieComposition _composition;

  // ... inside .lottie import
              onLoaded: (composition) {
                // the content of this Lottie animation
                _controller.duration = composition.duration;
                _composition = composition;
              },
The frame number 60 is found by watching the Lottie animation in a player. In frame 60, the animation reaches a state where it is day. Frame 0 starts with the night.
The two animation methods work by playing the animation
from frame 0 to 60:
animateToDay()from frame 60 to 0 in reverse:
animateToNight()
The animation controller API takes in ratios when playing from frame number to frame number. As such, we give it the total frame count.
Tying Things Up
Finally, let's write the callback for the GestureDetector.
  /// Inner state for whether it is day or night
  bool _isDay = false;

  /// Change to day if night and vice versa.
  /// Ignore input if the animation is still in progress.
  void changeDayNight() async {
    if (_controller.isAnimating) return;
    if (_isDay == true) {
      await animateToNight();
      _isDay = false;
    } else {
      await animateToDay();
      _isDay = true;
    }
  }

  @override
  Widget build(BuildContext context) {
    return GestureDetector(
      onTap: changeDayNight,
      // ...
TickerFuture is a Dart future. We wait for them to complete before switching the inner state Boolean so that the Boolean reflects the screen logic.
And voila!

If you need to check out the full source code, click here. Feel free to comment and file issues!